I ran into this video and was intrigued by the idea of creating a low-poly portrait for myself. So I thought of documenting the steps involved.
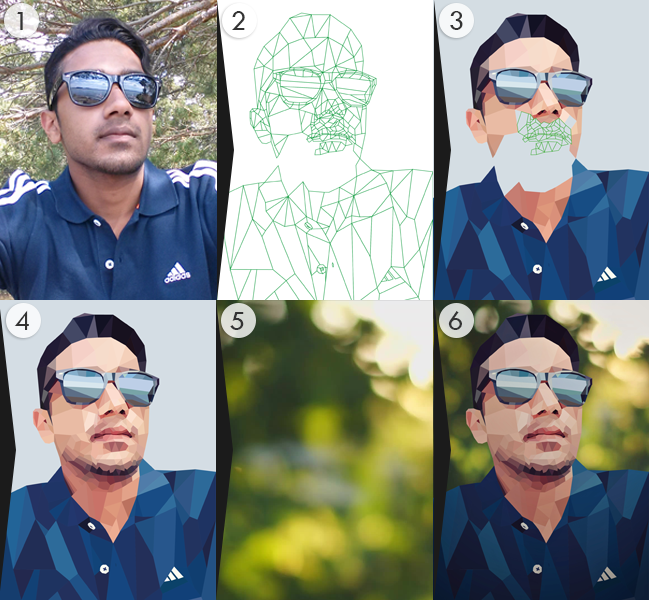
- The first step is to find a good portrait with a clear face. Search on the web for _low-poly face_ to get an idea of what sort of portraits work. It doesn't have to be a portrait, but a low-complexity image works best. Since I didn’t have the patience to take a portrait for this purpose alone, I went through my phone and found a picture that I thought might work.
-
Import the image into _Adobe Illustrator_ or any vector handling application, add a new layer above the image and start creating polygons (2). This is the most time-consuming part. Here are some suggestions for creating polygons:
- Create polygons for areas with similar colours/tones.
- Stick to 3 sided polygons (triangles). It works best.
- Larger and fewer triangles for low complexity areas and several smaller triangles for higher complexity areas.
- Direction and general flow of the mesh must compliment the contours in the image.
- Too many or too few triangles can ruin the final result.
- Take your time to do the polygons as this makes all the difference.
- Complete all the polgons and connect the edges. Do not leave any gaps.
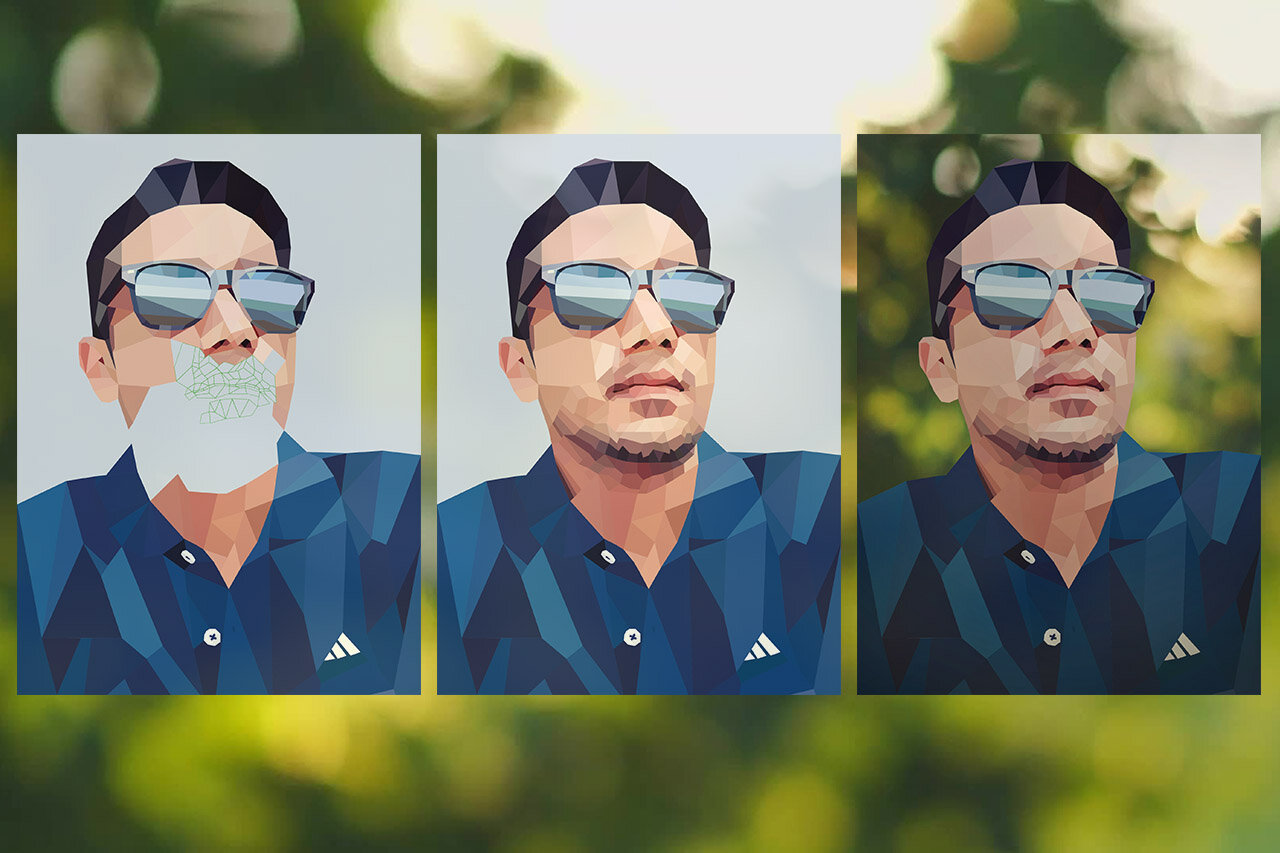
- Once the polygons are done, select each polygon and with the *eyedropper* tool, fill it with the colour at the centre of the polygon in the image.
- Once the polygons are all coloured, you might want to change the background or leave it plain. I decided to go for a defocussed foliage with sunlight as my background. Export the image as a .png with transparent background and import into *Adobe Photoshop* or any other image editing software. Position the poly layer over your desired background as you see fit. Adjust brightness/contrast, hue/saturation of both layers as required.
- Flatten the layers and use _Lighting effects_ filter to add a directional light/spot light. Do not overdo this. Then add a _Photo filter_ if required to further blend the portrait and background. Go to _Curves_ and lower highlights in blues slightly to create softer whites. Add a light vignette and bam! You are done.
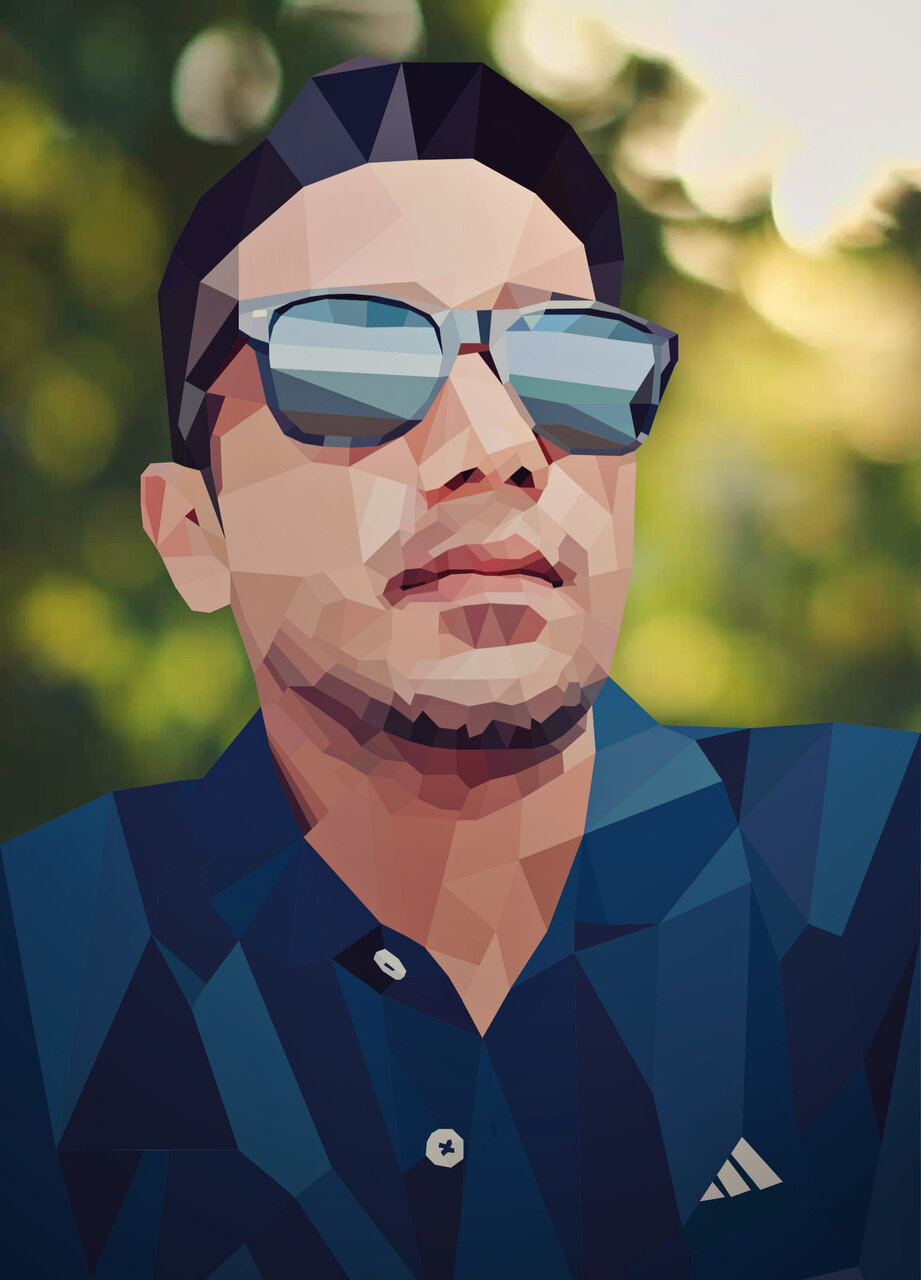
Here is the final result.
A detailed tutorial is on this blog by the original author. Don’t forget to check out the comments section of the blog for user generated low-poly portraits.
Comments